How to impress French people: Green Tea Macarons

It’s spring! Freaking finally! I never thought this would happen, but I can look out my window without seeing a winter wonderland. In honor of all this lovely green, and the fact that my coworkers are mad at me because I might be leaving them, I decided to make them some macarons.

The coolest part about my coworkers is that most of them are French, and I was just too excited today when they all ate my macarons and said they were good! Whoo! And I know what you’re thinking, they weren’t just being polite. French people are very rarely polite for the sake of being polite; my macarons sucked,I would have known for sure.20150426_192937

The green tea flavor was an idea from a book I have, and I slightly modified the recipe to use matcha powder, green tea powder, to color and flavor it. I’ve made some green tea baked products before, namely cake, and the results were not what I desired. But, I decided to give it a go with the macarons and was pleasantly surprised. They start out kind of sweet because of the honey buttercream that I used to fill them, but then you get a strong flavor of the green tea afterward. They are really refreshing and too dangerous; I almost ate all of my extras.

Even my French friends were impressed that I could make macarons, because there seems to be some sort of mythical hype around them. “Did you have to guard the oven the whole time?” one asked. Um, no? Macarons are mythically difficult to make, don’t be intimidated! Here are some surefire ways to get them right:

  1. Fold the batter– macarons are made with meringue, whipped egg whites, and its fluffiness must be maintained! You should gently fold the dry ingredients in to the meringue; so basically, gently use a spatula to stir around the edges of the bowl and cut through the middle until it all combines.
  2. Let it rest– this is really important! After you pipe the batter onto your parchment, let that batter take a rest. It needs to rest for about 30 minutes, or long enough so that you can touch one of the circles without any of the batter sticking to your finger. It can take less or more time depending on the weather and humidity, so just make sure that film has formed over it before you bake.
  3. The frilly foot, or pied— yup. The bottom of the cookie, that fluffy-looking part, is called a foot. But because it’s in French it sounds elegant, right? This is the secret to knowing when the macarons are done; when they are at the end of the bake time, try and lift one of the cookies. If the foot is wobbly or still sticking to the sheet, let ’em cook a little more, just a minute or two and then check again.

See? Simple! They’re not so much hard to make as temperamental, just pay attention and you’ll do fine. You may even impress some people… or just eat them all yourself. For macaron recipes, you can try a book or something online. The way to know if it’s a good recipe is if the ingredients are at least, egg whites, ground almonds, and white and confectioner’s sugar. After that, it’s basically just different flavors that will alter the ingredients. You can also check out good ‘ol Food Network’s recipe.

So I made a Minion Cake

Well hey there! Long time no see to all of you bakers out there. In the last few weeks I’ve learned that not only are Christmas and treadmills not friends, but Christmas and writing-about-baking are not friends! But that’s cool, because it’s a new year and I have plenty of new things to bake.

Last year (aka, December), not only did I bake up a storm for Christmas, but it was also my mother’s birthday. Not ideal for a baker, but you do not want to be slacking when making your mom’s birthday cake let me tell you. I’m sure you are familiar with those adorable Despicable Me movies, or at least the cute little minions that star in them. Who doesn’t love them? I was dying to make an improved minion birthday cake, the one I made for my brother was not my best work.

This was surprisingly easy to make, so I’ll give you some tips for making a one-eyed yellow sidekick.

  1. Only buy white fondant. This may sound like extra work, because tinting fondant can be a pain in the behind, but I have latched on to a new baking trend: spray color! Yes, I cut the white fondant for all of the pieces I need (eyes, clothing, mouth, etc.) and spray them with food coloring spray. It’s surprisingly easy, and saves you from having to knead in four different colors of food coloring. Just make sure you cover your counters, that stuff can be very messy.
  2. Keep it simple. The last minion cake I made, I tried to get too fancy and didn’t have enough time to make it work. This time, I only made the absolute minimum decorations and had time to make them look great. Simplicity will always look nice, so don’t be afraid to be lazy and skip those last few steps!
  3. Improvise. I always have to improvise, but initially the minion cupcakes weren’t a part of my plan. I had too much cake batter, so I decided to make cupcakes with it. When they came out perfectly round and adorable, I figured Why not make more minions? More minions is always a good choice. Have fun with your decorating and don’t be afraid to stray from your initial plans, who knows what you’ll come up with.

So here are my two tries, which one do you like better?

Christmas Gift Trick: Cookie Mugs

You may recognize Christmas as one of the most pleasant seasons of the year (or you may not, no pressure). But sometimes all of the merriment, gift-giving, cookie-baking, and decorating can start to really hurt your wallet. And that’s fine! I mean losing weight is good… right? Well, maybe not from your wallet; but you don’t want to be cheap (that’s not in the Christmas spirit!). It’s the thought that counts, not how much you spend. Yada-yada, I’m not going to get into it; I’m assuming you’ve seen at least one Christmas movie.

So how do you give thoughtful, quality gifts without starving your wallet? Christmas cookies! Okay, here’s what you have to do. Buy one holiday mug per person you want to give a gift too. They don’t have to be expensive, you can find nice ones at less-expensive stores that are perfectly good. Then, make as many cookies as you can in as many kinds as you want. Next, fill the mugs with the cookies! IMG_1855

It may sound simple, but a pile of cookies will brighten almost anyone’s day, and the mug will last as a gift that will sit in their kitchen for eternity! (I don’t know about you, but I never throw out mugs.) It helps if you can make a festive gingerbread to put on top, but really this one is all about what you can do. (Ignore the ones in the picture, they were festive but also a thank you gift for people.) To make it look more full you can throw in some bite sized candies too, or a hot chocolate mix! Then wrap them up in cellophane with a nice bow, and you have conquered the holiday gifts for your acquaintances, co-workers, and the people-who-you-aren’t-sure-you’re-exchanging-gifts-with-but-have-to-be-prepared-for-just-in-case.

Don’t pay for a perfect panini, make one with these simple tricks

A sandwich can be a mundane way of supplying nutrients to oneself, or a fantastic way of harnessing and consuming many flavors with a single bite. Food should never be just a way to get nutrients, so therefore I take sandwich-making very, very seriously.

The understanding of surface area can be applied to the creation of masterful sandwiches. You see, a spread of condiment on a sandwich must equal the total surface area of one piece of bread in order to achieve equal taste distribution throughout the sandwich-eating experience. In other words, you have to make sure your mayo, mustard, or chipotle-mayo is evenly distributed across all of the bread, otherwise you may get some bland bites! This applies not only to condiments, but to meats, cheeses, vegetables, and anything else people are piling on sandwiches these days.

Even distribution is especially important for my favorite kind of sandwich: the beloved panini. A lot of people may think that to make a panini you need to have one of those fancy presses, but this is a myth. You can just as easily use a plain pan, or even a waffle maker. I favor a plain pan, basically making a ramped-up grilled cheese sandwich. There are two things that you need to know to make the perfect grilled sandwich: 1, go low and slow and 2, condiments on top.

When we’re really hungry, we tend to get really impatient. But it can ruin your perfect sandwich! Patience is key; a sandwich cooked on the lowest heat (heat the pan first though) for as long as possible will yeild a  perfect crunch and liquid-y cheese. To keep your bread crispy without getting soggy, put your condiments on only one slice of bread and use that as your top piece of bread. If you use it as the bottom piece, it will seep into the bread and make it soggy and weak. When it’s cold and you don’t want to leave your house, a panini is the perfect comfort food. Don’t settle for a plain or expensive deli panini, impress yourself with your new found sandwich know-how.

Gingerbread and my pastry bag trick

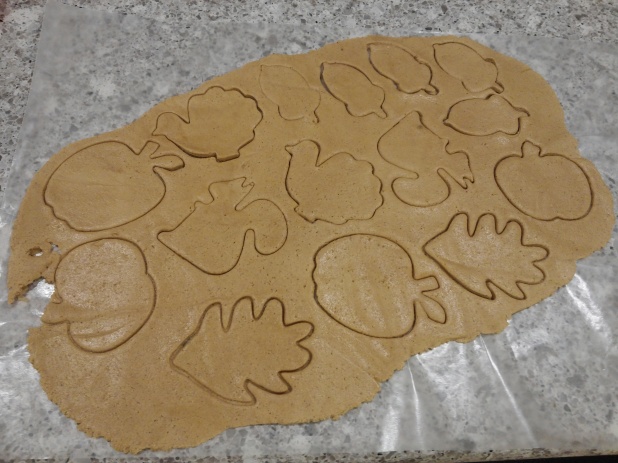
My sister deserves an award for her commitment to our sibling-hood. Siblings, at least the younger ones, are meant to drive the older ones nuts, and my sister has gone far beyond the expectations. So much so that she’s started listening to Christmas songs in October. I love a White Christmas, and some Jingle Bells, but not when it runs over my Thanksgiving! I don’t want Christmas to start until the day after Thanksgiving, and I mean the next morning, none of that tricky midnight stuff. But the one tradition that I let sneak into my other holidays is gingerbread! I have a soft spot for gingerbread, so much so that I even make it in the summer. I may have a problem, but at least I’m happy and using my 200 cookie cutters.

Of course, I still make gingerbread during Christmas time, but I have to say that turkeys are one of my favorite shapes to decorate. This time I was particularly lazy decorating, it took way longer than I had expected to roll out all of my dough and get the cookies baked, so I was kind of pooped once it was time to decorate. I decorate my gingerbread with plain royal icing, but I hate cleaning it! Instead of using a regular pastry bag, I use the disposable ones. They’re a life saver! I had cleaning pastry bags, and I can literally cut the coupler and tip out of the disposable ones when I’m done. But filling them can be a pain, especially when it’s just me. So I prepare the bags that I want, and flip half of the bag inside out. I put the bottom into a glass and fold the top of the bag over the sides of the glass. That way, I can be sure I won’t spill any icing, and the top of the bag stays nice and clean!

Gingerbread are great to give as gifts, they stay fresh for a long time, if they last that long… I may have already eaten way too many of the ones I made last night. But it was quality control. So don’t sing your Christmas carols too soon so you can start making gingerbread, just try some gingerbread for another holiday!

Halloween Petit Fours and Spontaneous Baking

petitspumpkinsWhen I got home from work today, there were a couple of things that I was sure of. One, I was hungry; two, Halloween is on Friday; and three, I didn’t want to do my homework. So the clear solution for these three chunks of knowledge was clearly to bake something, but what?

Spontaneous baking is one of the best kinds; there’s no pressure! The only snag is that you may not have all of the important ingredients and you may have to make an emergency trip to the store (as I learned today). Gathered a bunch of my favorite cookbooks and I was actually having some trouble. I was going to make cupcakes, then I was going to make brownies, then I was going to make cake; you see my problem. Too many choices! I decided by accident to make petits fours, because they’re tiny and I could get creative for Halloween.


“Petits Fours” is french for “little ovens,” which make sense because these things are normally pretty small. Well I might speak french but I am definitely american, so I made some freaking big petits fours. Why not? Okay so I did make some that were bite-size, but I mostly made the cute shaped ones. It wasn’t as easy as I had planned, but I used cookie cutters as a guide to cut the cake out (the cake is really thin, there are two layers). The recipe that I used came from the Illustrated Cookbook, but I know Martha Stewart has a good recipe for these too. The recipes usually call for jam filling, but I think that combining jam and cake is just not right.petitspumpkins2

I was going to simply mix some melted chocolate and cocoa powder with marshmallow fluff, but save yourself the trouble and don’t get into that mess! It just turned into a marble-y ball of sugar that got stuck in my whisk; it tasted good though. So after that failure I just decided to make real fluff: meringue! So I fluffed up two egg whites and added some sugar and cocoa powder, it came out exactly how I wanted. For the frosting I kind of just eyeballed in some ingredients, but I’d recommend the Wilton buttercream recipe. Then decorate and enjoy! I made my cake coffee flavored, you can really pick whatever flavor and shapes you want, always a plus.

3 Tips for Decorating Like A Pro

By no means am I saying that I my decorated cakes look professional; I am not that delusional. But I know a little more than the average person, and sometimes my cakes don’t turn out half bad. I’ve figured out some pretty neat stuff through all my successes and failures, and thought I’d share it with you.

DSCN0716

1. Vegetable Oil

I’m not talking about greasing the pan, I use it to grease the fondant. Most places will tell you to use powdered sugar to keep the fondant from sticking on your counters when you roll it out, but it makes such a mess and can dry out or make your fondant powdery looking. I don’t know how I started doing this, but it works just as well to spray some vegetable oil non-stick spray on your counter instead. And it makes your fondant nice and shiny! Just be careful not to use too much, that could be gross.

2. Tools

I was taught in math class that the calculator is a crutch, but I look at it as a tool. I love tools, they make things easier! I have a lot of baking tools but one of the most useful for fondant decoration is a Ribbon Cutter. Since I’ve gotten it I use it every time I decorate a cake. A fondant ribbon or some stripes is a really easy and cute way to decorate a cake, and the cutter satisfies the need I have for perfectly straight lines.

3. Keep it clean

If you were to put two plain cakes, one professionally done and one homemade, next to each other you would probably know which one is professional. The key to making something look like you bought it is nice clean edges and level layers. When you’re making the layers, use a cake leveler to make sure they’re even. When you coat with buttercream, make sure it’s even. You can even square off the top edge of the cake using your angled spatula, and chill before you add fondant or more buttercream.

4. Do what you know

Fondant covered cakes have been all the rage the last few years, but it’s not always necessary. Pick a skill or two that you can do well, and do it well! It’s better to pick something that you’re good at and use it artfully than to try a bunch of things and cover the cake with them. It helps to plan out what you’re going to do in advance, and as things go wrong you can add or subtract. Save the new skills for the practice run!

Cinnamon Apple Coffee Cake

image

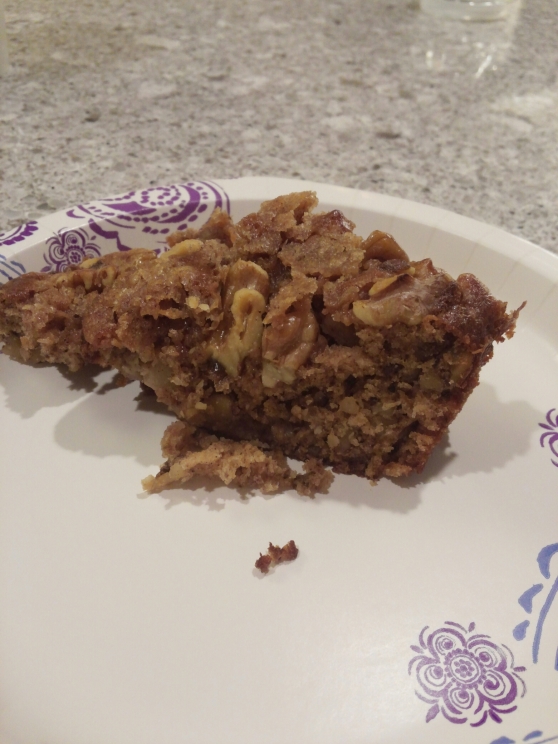
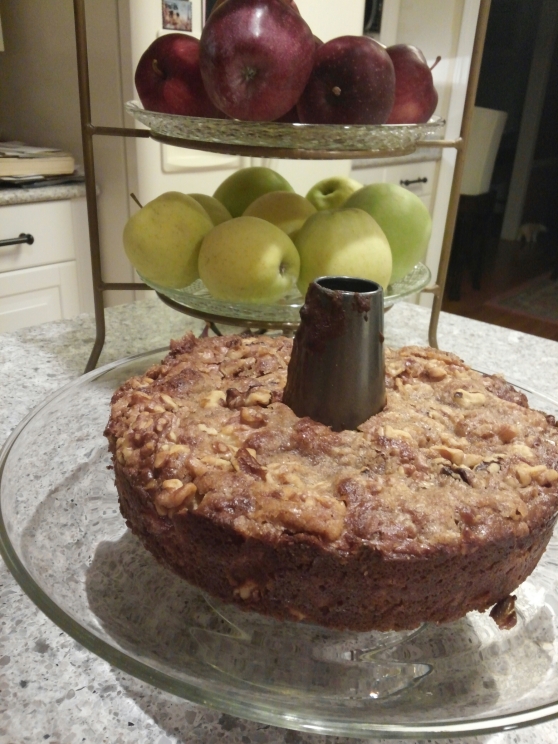
I know two things: one, I hate peeling apples; two, I bought too many apples when I went apple picking. Seriously, my body is in shock from all of the unexpected apple-nutrients I’ve been consuming. So while I’m on this “health kick” (aka, streudel), why not extend it? This means that I’ve finished the strudel and didn’t have enough homework to keep me from baking. The result: Apple Cinnamon Coffee Cake!

So now my house smells amazing and I’ve used up a grand total of two apples. I used this recipe from Allrecipes.com and I am impressed. I made a couple changes, and am really happy with the results. I chose this recipe because I wanted something that had chunks of apple and that wasn’t a light cake. It came out very moist and it was exactly the kind of thing I was looking for.

Here are the changes I made:

1 tsp of cinnamon in the batter instead of 1/2 tsp. Ok so how much of a difference did this actually make? I’m not sure but I don’t think you can have too much cinnamon unless you’re taking a cinnamon challenge.

Walnuts! I added walnuts, because I couldn’t picture a coffee cake with chunks of apple and no crunch. I don’t know how much I added, maybe 1-2 cups chopped walnuts? You could use pecans too; I sprinkled some on top after I added the crumb topping too.
image
The crumb topping in this recipe was a little weird and not what I wanted. I didn’t even fix it, but I would just recommend to make the crumbs from my Coffee Cake Recipe (use a half a batch for this though).

The recipe originally called for an 8″ pan, but I was really feeling the bundt shape for this. You can really use whatever you want, just be careful not to go too big, or you’ll have to change the bake time or temperature.

*Tip* If you’re going with a deeper pan, set the oven about 50 degrees higher and cook longer. If you’re going shallow, just shorten the cook time. Either way, keep an eye on it because disaster can always strike!

This recipe came out great and I’d definitely make it again with different crumbs. And if you don’t end up liking it, your house will still smell amazing!

Apple Picking and Nana’s Strudel Trick

I know I’ve expressed some distaste for fall, but that’s only because I hate the cold. Really, I love the changing colors, the pumpkins, and the food! Apple picking is one of the highlights of the fall, I mean look at these views! On a gorgeous fall day, it’s a great way to get outside, eat some fruit, and enjoy the season. The problem is, I like apple picking too much. I went with my sister this weekend, the orchard we went to had us buy a net bag from them first and then they sent us off picking. Well let me tell you how smart that was, we filled up that bag pretty freaking fast, and wanted to stay out picking apples. $46 worth of apples later, I realized I needed to find something to do with apples. I’ve already planned to make applesauce and  apple coffee cake, but my Nana thought it would be a good idea to make strudel.

Not to be confused with the crumbly topping streusel, strudel is a rolled up pastry that can be made with different fillings. Nana knows a thing or two about cooking and baking, and she was gracious enough to give a strudel crash-course. I was pleased to find out that it’s a fun thing to make, and beating the dough is a great way to get out any aggression or a great workout for your arms. Because her recipe was in an ancient book, I suggest you try this one; it only says to “knead the dough,” but Nana wants to let you know that you need to vigorously slap it around on the counter for it to be good.

Now the trick that can be found in this recipe and was shown to me by Nana, is to roll out the dough on a floured tablecloth. It seems kind of strange at first, but its an old and magical trick that can be used for all kinds of pastry projects. Instead of picking up the dough, simply pick up the end of the table cloth and lift it to roll the dough together. It’s mesmerizing, easy, and leaves little mess! Thank you Nana! Strudel is a delicious fall treat and it made me feel better about buying so many apples.

How to Eat Dessert for Breakfast

For some ungodly reason, someone once said that we cannot have dessert after breakfast. Every other meal is okay, but poor breakfast misses out (unless of course you count those milkshakes called “frappucchinos” at a certain coffee chain). But there are ways around this wrongdoing; you can eat pancakes covered in stuff, waffles covered in stuff, or fill your coffee with some nice dessert flavored sugar milk. All good plays, but I like to take it a step further.

image

The French do not have pancakes, if you go to France and ask for pancakes you will be met with crepes. Which is wonderful! But there are a few ways to eat these bad boys: 1) with nutella or jam and folded up so you can eat it on the go, 2)filled with some lunch-type stuff like ham and cheese (this is actually called galette), or 3) filled with fruit and chocolate and topped with whipped cream. While these choices are all delicious, only one fits the criteria for a dessert disguised as breakfast: option number 3!

So here we go, here’s a crepe recipe courtesy of Mr. Alton Brown (he’s a really reliable source for all kinds of recipes). The way to identify a good crepe recipe is that it should have as few and simple ingredients as possible, just some sugar, flour, butter, and egg. Anything out of that realm is gonna be some weird gimmicky one that’s not authentic. So prepare crepes as described in the recipe, you’ll need a good pan of whatever size crepes you want to be making.

Heat the pan for a bit, and then grease with butter. I usually use about a 10 inch pan, and I put in 1/4 cup of batter in there. Pick up the pan and swirl the batter around until it covers the whole bottom evenly. You should be cooking on medium-high heat, they cook really fast. If you want to be fancy, you can flip the crepe when it’s ready (when you check underneath and it’s starting to be golden brown), or you can use a spatula. The first crepe usually doesn’t come out good because of the butter in the pan, so don’t worry if it doesn’t look right. Your second one will be better I promise.

After you have a nice stack of them, you can begin eating! I’ve seen a lot of things put in crepes, but for a dessert them I’m going to recommend some nutella, strawberries, bananas, walnuts, and whipped cream. Dust some powdered sugar on the plate if you’re still trying to be fancy. Really you can put anything you want in a crepe, but I think for it to qualify as a breakfast-dessert you need to have at least one fruit or nut in there. But be creative! Crepes are delicious almost any way; now you can enjoy some nice dessert to start your day.