So I made a Minion Cake

Well hey there! Long time no see to all of you bakers out there. In the last few weeks I’ve learned that not only are Christmas and treadmills not friends, but Christmas and writing-about-baking are not friends! But that’s cool, because it’s a new year and I have plenty of new things to bake.

Last year (aka, December), not only did I bake up a storm for Christmas, but it was also my mother’s birthday. Not ideal for a baker, but you do not want to be slacking when making your mom’s birthday cake let me tell you. I’m sure you are familiar with those adorable Despicable Me movies, or at least the cute little minions that star in them. Who doesn’t love them? I was dying to make an improved minion birthday cake, the one I made for my brother was not my best work.

This was surprisingly easy to make, so I’ll give you some tips for making a one-eyed yellow sidekick.

  1. Only buy white fondant. This may sound like extra work, because tinting fondant can be a pain in the behind, but I have latched on to a new baking trend: spray color! Yes, I cut the white fondant for all of the pieces I need (eyes, clothing, mouth, etc.) and spray them with food coloring spray. It’s surprisingly easy, and saves you from having to knead in four different colors of food coloring. Just make sure you cover your counters, that stuff can be very messy.
  2. Keep it simple. The last minion cake I made, I tried to get too fancy and didn’t have enough time to make it work. This time, I only made the absolute minimum decorations and had time to make them look great. Simplicity will always look nice, so don’t be afraid to be lazy and skip those last few steps!
  3. Improvise. I always have to improvise, but initially the minion cupcakes weren’t a part of my plan. I had too much cake batter, so I decided to make cupcakes with it. When they came out perfectly round and adorable, I figured Why not make more minions? More minions is always a good choice. Have fun with your decorating and don’t be afraid to stray from your initial plans, who knows what you’ll come up with.

So here are my two tries, which one do you like better?

Gingerbread and my pastry bag trick

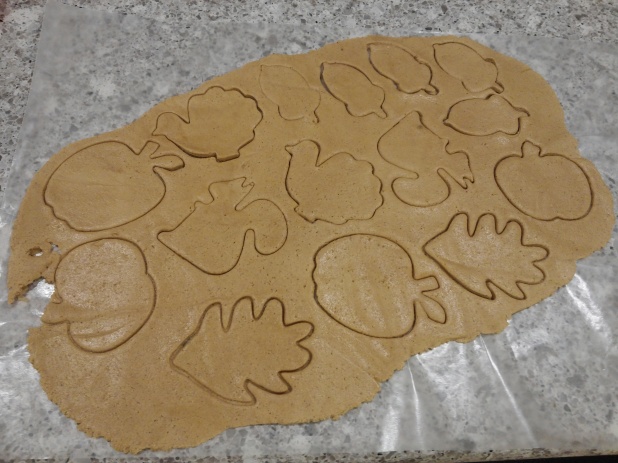
My sister deserves an award for her commitment to our sibling-hood. Siblings, at least the younger ones, are meant to drive the older ones nuts, and my sister has gone far beyond the expectations. So much so that she’s started listening to Christmas songs in October. I love a White Christmas, and some Jingle Bells, but not when it runs over my Thanksgiving! I don’t want Christmas to start until the day after Thanksgiving, and I mean the next morning, none of that tricky midnight stuff. But the one tradition that I let sneak into my other holidays is gingerbread! I have a soft spot for gingerbread, so much so that I even make it in the summer. I may have a problem, but at least I’m happy and using my 200 cookie cutters.

Of course, I still make gingerbread during Christmas time, but I have to say that turkeys are one of my favorite shapes to decorate. This time I was particularly lazy decorating, it took way longer than I had expected to roll out all of my dough and get the cookies baked, so I was kind of pooped once it was time to decorate. I decorate my gingerbread with plain royal icing, but I hate cleaning it! Instead of using a regular pastry bag, I use the disposable ones. They’re a life saver! I had cleaning pastry bags, and I can literally cut the coupler and tip out of the disposable ones when I’m done. But filling them can be a pain, especially when it’s just me. So I prepare the bags that I want, and flip half of the bag inside out. I put the bottom into a glass and fold the top of the bag over the sides of the glass. That way, I can be sure I won’t spill any icing, and the top of the bag stays nice and clean!

Gingerbread are great to give as gifts, they stay fresh for a long time, if they last that long… I may have already eaten way too many of the ones I made last night. But it was quality control. So don’t sing your Christmas carols too soon so you can start making gingerbread, just try some gingerbread for another holiday!

3 Tips for Decorating Like A Pro

By no means am I saying that I my decorated cakes look professional; I am not that delusional. But I know a little more than the average person, and sometimes my cakes don’t turn out half bad. I’ve figured out some pretty neat stuff through all my successes and failures, and thought I’d share it with you.

DSCN0716

1. Vegetable Oil

I’m not talking about greasing the pan, I use it to grease the fondant. Most places will tell you to use powdered sugar to keep the fondant from sticking on your counters when you roll it out, but it makes such a mess and can dry out or make your fondant powdery looking. I don’t know how I started doing this, but it works just as well to spray some vegetable oil non-stick spray on your counter instead. And it makes your fondant nice and shiny! Just be careful not to use too much, that could be gross.

2. Tools

I was taught in math class that the calculator is a crutch, but I look at it as a tool. I love tools, they make things easier! I have a lot of baking tools but one of the most useful for fondant decoration is a Ribbon Cutter. Since I’ve gotten it I use it every time I decorate a cake. A fondant ribbon or some stripes is a really easy and cute way to decorate a cake, and the cutter satisfies the need I have for perfectly straight lines.

3. Keep it clean

If you were to put two plain cakes, one professionally done and one homemade, next to each other you would probably know which one is professional. The key to making something look like you bought it is nice clean edges and level layers. When you’re making the layers, use a cake leveler to make sure they’re even. When you coat with buttercream, make sure it’s even. You can even square off the top edge of the cake using your angled spatula, and chill before you add fondant or more buttercream.

4. Do what you know

Fondant covered cakes have been all the rage the last few years, but it’s not always necessary. Pick a skill or two that you can do well, and do it well! It’s better to pick something that you’re good at and use it artfully than to try a bunch of things and cover the cake with them. It helps to plan out what you’re going to do in advance, and as things go wrong you can add or subtract. Save the new skills for the practice run!

The 3 Coolest Cakes I’ve Made

Since I’ve taken an interest in baking and cake decorating, all of my family and friends have received a decorated cake for their birthday. They act so thankful and think I’m being nice; when really, I just enjoy doing the baking and decorating process. I was feeling nostalgic today so I was looking through the pictures of the cakes I’ve decorated, and I tried to pick a favorite. I was unsuccessful; I have a special love for all of my projects, and there are three that I got stuck on.

These are all pretty different, and took varying levels of life out of me. The Formula 1 Car cake took me about two days between pre-baking the cake (chocolate with coffee-mousse filling) to decorating it. It was for my uncle’s 55th birthday and this cake was really fun because the more I added to it the better it looked.

The Cat in the Hat cake was for my mom, it was actually a carrot cake. My brother helped me with this one; we made the hat stand up by stacking circles of cake layered with frosting and a smoothie straw stuck in them. Please pretend that you don’t see the number on the hat, my mom would not be happy with me posting this.

The avengers cake was so much fun to make and I think I am the most proud of it. I spent forever planning it and had to really use my limited art skills to make the Iron Man, Hulk, Captain America, and Thor icons for the side. The best part about making cakes like this is planning them out. When I make them with my brother this takes way longer because we argue about how the cake should look, but surprisingly we haven’t killed each other yet. Never have I had a cake turn out exactly as I envisioned it, but I have always been pleasantly surprised to see the outcome.

Simple Tricks for Spectacular Cupcakes

Cupcakes have a lot of weight to carry for such tiny fluffy things. They are on TV shows like Cupcake Wars, Cupcake Girls, DC Cupcakes, and Georgetown Cupcakes; that’s a lot of pressure! Everyone loves to eat cupcakes, but sometimes these TV shows make your cupcakes feel inadequate. No worries, here are my top tricks to achieving some TV-worth adorable cupcakes without all the drama.

Cute liners do the work for you

Are you worried about tinting frosting? You may not have to, try some cute liners! They add fun and color without any extra work, just add some sparkly sprinkles to your frosting and you will dazzle everyone. Sometimes the light patterns won’t show up if you have a dark cupcake like chocolate. I think the Reynold’s Stay Brite liners with foil are great, they won’t fade!

IMG-20130307-00033

You can also try the baking cups like the ones in the picture, they are a little smaller but cute and easy to use! Some people like to use a cupcake wrapper, but that’s a whole extra step at the end, I like to keep it simple.

When in doubt: sprinklesIMG-20130124-00012


It may sound obvious, but the right sprinkles on a simple cupcake can be just what you need. Sprinkle technology has long surpassed the traditional rainbow and chocolate; you can get sprinkles in any color and tons of shapes. With a cute liner or some tinted buttercream, sprinkles add just a touch of interest without working your fingers to the bone to make custom fondant decorations.

When you do want to do fondant, flat is fine!

There’s a lot of pressure to create a spectacular 3D figure for each of your 24 cupcakes, but who’s got the time?! Unless I’m looking to hire a bunch of Play-Doh experts, don’t sign me up for 3D fondant. Instead, you can layer different color fondant cut out from cookie cutters to decorate your cupcakes for any occasion. For these shapes I used my Cricut, it’s great for lazy people like me who hate spending time on fondant. It’s a fun craft activity to with friends or kids, and leaves much less mess and frustration.

Cupcakes should be fun and cute, don’t work too hard! These little things can’t take too much decoration, and are great for parties and hostessing. What are your favorite tricks for cupcake decorating?

Making a Shaped Cake

One of the most easily impressive cake designs are shaped cakes. They can be full of imperfections, but the shock value of a shaped cake can brush them under the rug. I have made a fair amount of shaped cakes, and from a professional standpoint, they are very poor quality, yet they are still impressive.

I will relay my top tips to making a successful shaped cake, hopefully you will be able to impress your friends with these tips!

1. Google

This may sound like a cop out, but whenever I decide what kind of cake I want to make, I always Google images it. This is always my first step because it helps me figure out the design and finding the best way to make what I want. I usually end up combining a bunch of different designs that I like to make my own design.

2. Diagrams

The Formula 1, and M1 Tank cakes are great examples of when I had to make diagrams. These cakes were custom made for people in my life, and naturally I didn’t know too much about these things before I made the cakes. For the Formula 1 cake, I actually found a diagram of an F1 car complete with real measurements, and I simplified it and converted it to a possible cake shape. But for some cakes, like the Gumby or Minion, this isn’t necessary. For Gumby I have a poster sized printer, and I just printed out an outline of him and then cut the cake around him. Every cake is unique, and you have to be resourceful.

3. Planning

This is the most important step, none of these cakes happen spontaneously. Once you have your diagram or your design, you can start figuring out the size and how you will construct your cake. The size depends on two factors: how many people you’re feeding, how difficult the design is. It’s easier to make a complicated cake bigger, because small details can be very difficult to fine-tune. Once you figure out the best size for your cake, you have to figure out what type of pan/pans to bake it in. This is the most difficult part, I measure all my cake pans and scale up my diagrams to make sure that I will have enough cake in the right size for me to construct my shape.

4. Assembly

After you’ve planned out and baked your cake, all that’s left is to assemble and then decorate. If you made a good plan, you can basically just cut the baked cake(s) and stack them to make your shape (with buttercream between the layers of course, because it’s the glue in baking). Remember that this doesn’t have to be perfect, and that your actual cake will not measure perfectly like you planned, because it is still cake. Improvise when you need to, and when you’re finished constructing, cover with buttercream and  chill for a while so that it will be more sturdy for when you decorate.

5. Decorating

Decorating is highly dependent on what kind of cake you’re making. For the F1 cake, the more decorations I added, the better it looked. For the Gumby cake, there’s almost no decoration. You should have most of it planned out already, but don’t be afraid to play around, you can always take something off if it doesn’t look good. The key to decorating is knowing when to stop, nobody wants a cake covered with crap.

6. Be Accepting

I’m not a perfectionist, but I can get upset if my cake doesn’t turn out the way I envisioned. Because I’m not a professional, I very rarely end up with the cake I thought I would. When finished, instead of beating yourself up about the things that are different between your vision and the end result, just say “Good enough” and move on, your family and friends will love it anyway!